MiniMax MCP Tools and Parameters
1. text_to_audio
This tool converts the text to natural and fluent speech.| Parameter | Description | Format / Notes | Default |
|---|---|---|---|
| text | Required. The text to synthesize. | String, max length < 10,000 characters; use newline characters for paragraph breaks. | None |
| output_directory | Directory for saving audio files. | String (file path). | Path from config file |
| voice_id | Voice ID to use. | String, see API documentation for available options. | ”female-shaonv” |
| model | Model version to use. | String, see API documentation for available options. | ”speech-02-hd” |
| speed | Speed adjustment. | Float, range [0.5, 2.0]. | 1.0 |
| vol | Playback volume. | Float, range (0, 10]. | 1.0 |
| pitch | Pitch adjustment. | Integer, range [-12, 12]. | 0 (Output in original voice) |
| emotion | Emotional tone. | String, allowed values: [“happy”, “sad”, “angry”, “fearful”, “disgusted”, “surprised”, “calm”, “fluent”, “whipser”]; supported only by speech-2.8-hd, speech-2.8-turbo, speech-2.6-hd, speech-2.6-turbo, speech-02-hd, speech-02-turbo, speech-01-turbo, speech-01-hd. Option fluent, whipser support only by speech-2.8-turbo, speech-2.8-hd, speech-2.6-turbo, speech-2.6-hd. | happy |
| sample_rate | Audio sample rate. | Integer, allowed: [8000, 16000, 22050, 24000, 32000, 44100]. | 32000 |
| bitrate | Audio bitrate. | Integer, allowed: [32000, 64000, 128000, 256000]; applies to mp3 only. | 128000 |
| channel | Number of channels. | Integer, 1 = mono, 2 = stereo. | 1 |
| format | Output audio format. | String, allowed: [“pcm”, “mp3”, “flac”, “wav”]. | mp3 |
| language_boost | Language-specific enhancement. | String, see API documentation for available options. | null |
2. list_voices
This tool lists all available voices.| Parameter | Description | Format / Notes | Default |
|---|---|---|---|
| voice_type | Voice type to query | String, allowed: [system (built-in voices), voice_cloning (fast-cloned voices), voice_generation (voices created by the text-to-voice API), music_generation (vocal/accompaniment voices from music generation), all (all of the above)] | “all” |
3. voice_clone
This tool clones a voice from a specified audio file.| Parameter | Description | Format / Notes | Default |
|---|---|---|---|
| voice_id | Required. ID for the cloned voice. | String, rules: 1) Length [8, 256]; 2) Must start with a letter; 3) Digits, letters, - and _ allowed; 4) Must not end with - or _; 5) Must be unique. | None |
| file | Required. Audio file to clone from. | String, formats: [“mp3”, “m4a”, “wav”] | None |
| text | Demo text for the cloned voice. | String, no more than 2000 characters. | None |
| output_directory | Directory to save audio files. | String (file path) | Path from config file |
| is_url | Whether the source audio is a URL. | Boolean (True / False) | False |
4. voice_design
This tool generates a voice and preview audio from a prompt.| Parameter | Description | Format / Notes | Default |
|---|---|---|---|
| prompt | Required. Description of the voice to generate. | String | None |
| preview_text | Required. Text for preview audio. | String | None |
| voice_id | Custom ID for the generated voice. | String | Auto-generated unique value |
| output_directory | Directory to save preview audio. | String (file path) | Path from config file |
5. play_audio
This tool plays an audio file.| Parameter | Description | Format / Notes | Default |
|---|---|---|---|
| input_file_path | Required. Local path or URL of the audio file to play. | String (file path or URL) | None |
| is_url | Whether the audio source is a URL. | Boolean (True / False) | False |
6. music_generation
This tool generates music from a prompt and lyrics.| Parameter | Description | Format / Notes | Default |
|---|---|---|---|
| prompt | Required. Inspiration for the composition (style, mood, scene, etc.). | String, 10–300 characters | None |
| lyrics | Required. Lyrics for generation. | String, lines separated by \n; supports [Intro], [Verse], [Chorus], [Bridge], [Outro]; 10–600 characters. | None |
| sample_rate | Music sample rate. | Integer, allowed: [16000, 24000, 32000, 44100] | 32000 |
| bitrate | Music bitrate. | Integer, allowed: [32000, 64000, 128000, 256000] | 128000 |
| format | Music format. | String, allowed: [“mp3”, “wav”, “pcm”] | “mp3” |
| output_directory | Directory to save music files. | String (file path) | Path from config file. |
7. generate_video
Generates a video based on a prompt. At least one ofprompt or first_frame_image in the parameters is required.
| Parameter | Description | Format and Notes | Default |
|---|---|---|---|
| prompt | Video description | String, no more than 2000 characters | None |
| model | Model version | String, allowed values: [“MiniMax-Hailuo-02”, “T2V-01-Director”, “I2V-01-Director”, “S2V-01”, “I2V-01-live”, “I2V-01”, “T2V-01”] | “T2V-01” |
| first_frame_image | First frame image | Base64 string in data:image/jpeg;base64,{data} format, or a public URL | None |
| duration | Duration (seconds) | Integer, allowed [6, 10]. Depends on model and resolution: • 01 series (T2V-01, I2V-01, T2V-01-Director, I2V-01-live, S2V-01): 6 • 02 series (MiniMax-Hailuo-02): 512P: 6 or 10, 768P: 6 or 10, 1080P: 6 | 6 |
| resolution | Output resolution | String, depends on model & duration: • 01 series(T2V-01, I2V-01, T2V-01-Director, I2V-01-live, S2V-01): fixed (6s → “720P”) • 02 series (MiniMax-Hailuo-02): 6s default “768P”, allowed [“512P”,“768P”,“1080P”]; 10s default “768P”, allowed [“512P”,“768P”] | None |
| output_directory | Save path for videos | String (file path) | Config file path |
| async_mode | Async mode (returns task ID) | Boolean (True / False) | False |
8. image_to_video
Generates a video from a first-frame image. At least one ofprompt or first_frame_image in the parameters is required. Only available in the JavaScript/TypeScript MCP version.
| Parameter | Description | Format and Notes | Default |
|---|---|---|---|
| prompt | Video description | String, no more than 2000 characters | None |
| model | Model version | String, allowed values: [“MiniMax-Hailuo-02”, “T2V-01-Director”, “I2V-01-Director”, “S2V-01”, “I2V-01-live”, “I2V-01”, “T2V-01”] | “T2V-01” |
| first_frame_image | First frame image | Base64 string in data:image/jpeg;base64,{data} format, or a public URL | None |
| output_directory | Save path for videos | String (file path) | Config file path |
| async_mode | Async mode (returns task ID) | Boolean (True / False) | False |
9. query_video_generation
Queries the status of an asynchronous video generation task.| Parameter | Description | Format and Notes | Default |
|---|---|---|---|
| task_id | Required. Task ID to query | String | None |
| output_directory | Directory to save videos | String (file path) | Config file path |
10. text_to_image
Generates images from a text prompt.| Parameter | Description | Format and Notes | Default |
|---|---|---|---|
| prompt | Required. Image description | String, no more than 1500 characters | None |
| model | Model version | String, allowed values: [“image-01”, “image-01-live”] | “image-01” |
| aspect_ratio | Output aspect ratio | String, allowed values: [“1:1”, “16:9”, “4:3”, “3:2”, “2:3”, “3:4”, “9:16”, “21:9”] | “1:1” |
| n | Number of images per request | Integer, range [1, 9] | 1 |
| prompt_optimizer | Auto-optimize prompt | Boolean (True / False) | True |
| output_directory | Directory to save images | String (file path) | Config file path |
Use the MiniMax MCP Server in Clients
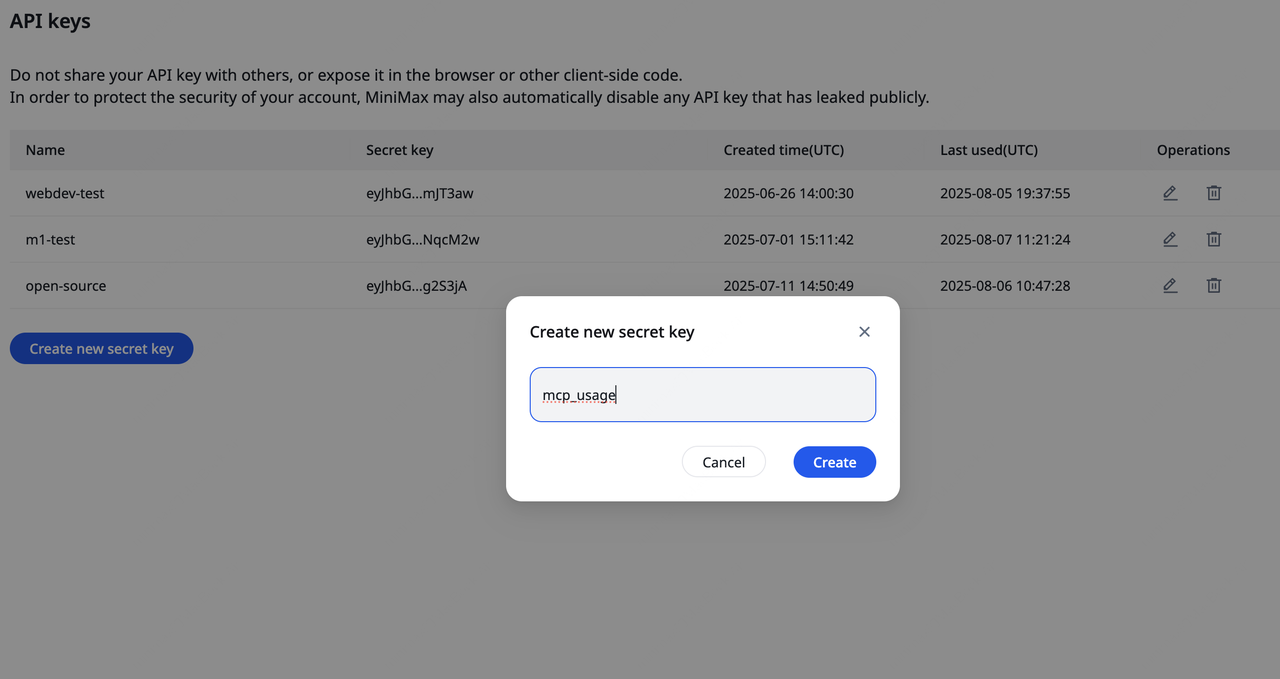
Get an API Key
- Visit the MiniMax Developer Platform.
- Click the “Create new secret key” button and enter a project name to create a new API Key.
- After creation, the system will display the API Key. Be sure to copy and save it securely. The key is shown only once and cannot be viewed again.
UVX Installation and Configuration
MiniMax‑MCP is a Python-implemented MCP service. To allow MCP clients to call it, the service must be started and executed viauvx. uvx is a command-line tool provided by uv, similar to npm exec. It is used to run executables defined within a package, ensuring environment isolation and dependency control.
- Install uv (to get uvx)
- macOS / Linux users:
- Windows users:
uv and uvx executables will be created under the Python environment’s Scripts or bin directory.
- Verify uvx is available Run the following command:
- macOS / Linux users:
- Windows users:
- If installed correctly, a path will be shown (e.g., /usr/local/bin/uvx).
- If you encounter the error
spawn uvx ENOENT, it means thatuvxis either not installed or not in your system PATH. You need to provide its absolute path.
Transport Modes
MiniMax-MCP provides two transport modes: studio and SSE. Choose as needed.| Mode | stdio (default) | SSE |
|---|---|---|
| Runtime | Local only | Local or cloud deployment |
| Communication | Via standard I/O | Via server-sent events |
| Use Case | Local MCP client integration | Applications requiring server push |
| Input | Supports local files or URL resources | When deployed in cloud, URL input recommended |
Use in Claude Desktop
- Download Claude Desktop.
- Go to
Claude > Settings > Developer > Edit Config > claude_desktop_config.json, add the following configuration. - Restart Claude Desktop when finished. Note: If you’re on Windows, enable “Developer mode” in Claude Desktop to use MCP servers. If you see the error
spawn uvx ENOENT, set the absolute path to uvx in"command".
Use in Cursor
- Download and install Cursor.
- Go to
Cursor -> Preferences -> Cursor Settings -> Tools & Inrgrations -> MCP -> Add Custom MCPto open the MCP tool config file.
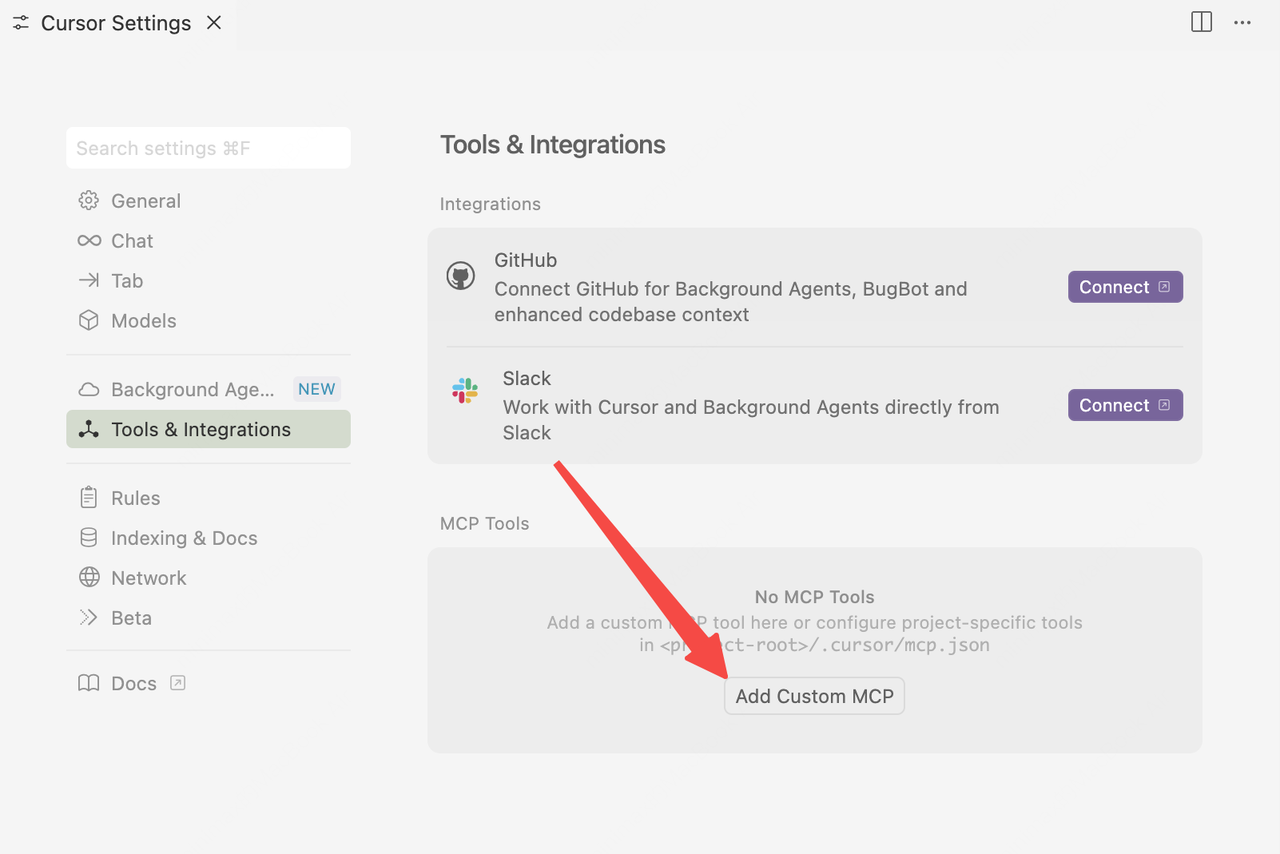
- Add MiniMax account configuration in
mcp.jsonfile.
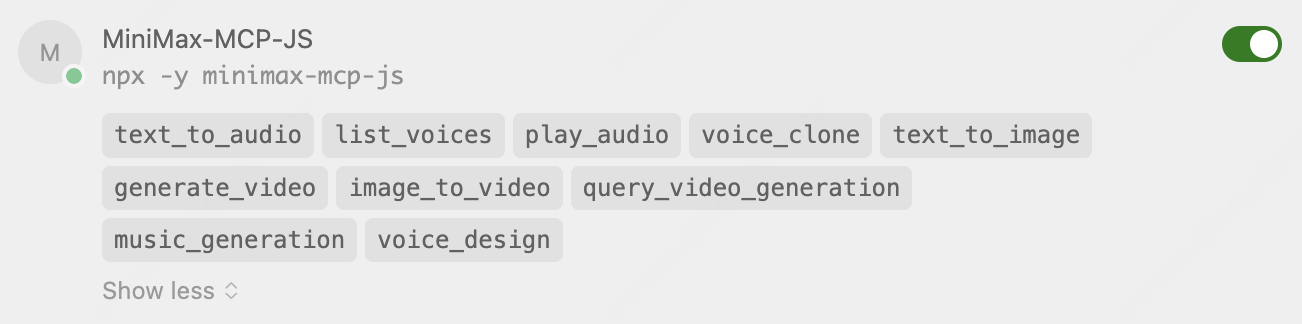
- After configuration, you can view the MCP tools currently supported by MiniMax.
Use in Cherry Studio
- Download the Cherry Studio client.
- Go to
Settings -> MCP Settings -> Add Server -> Import from JSON, paste the following and confirm.
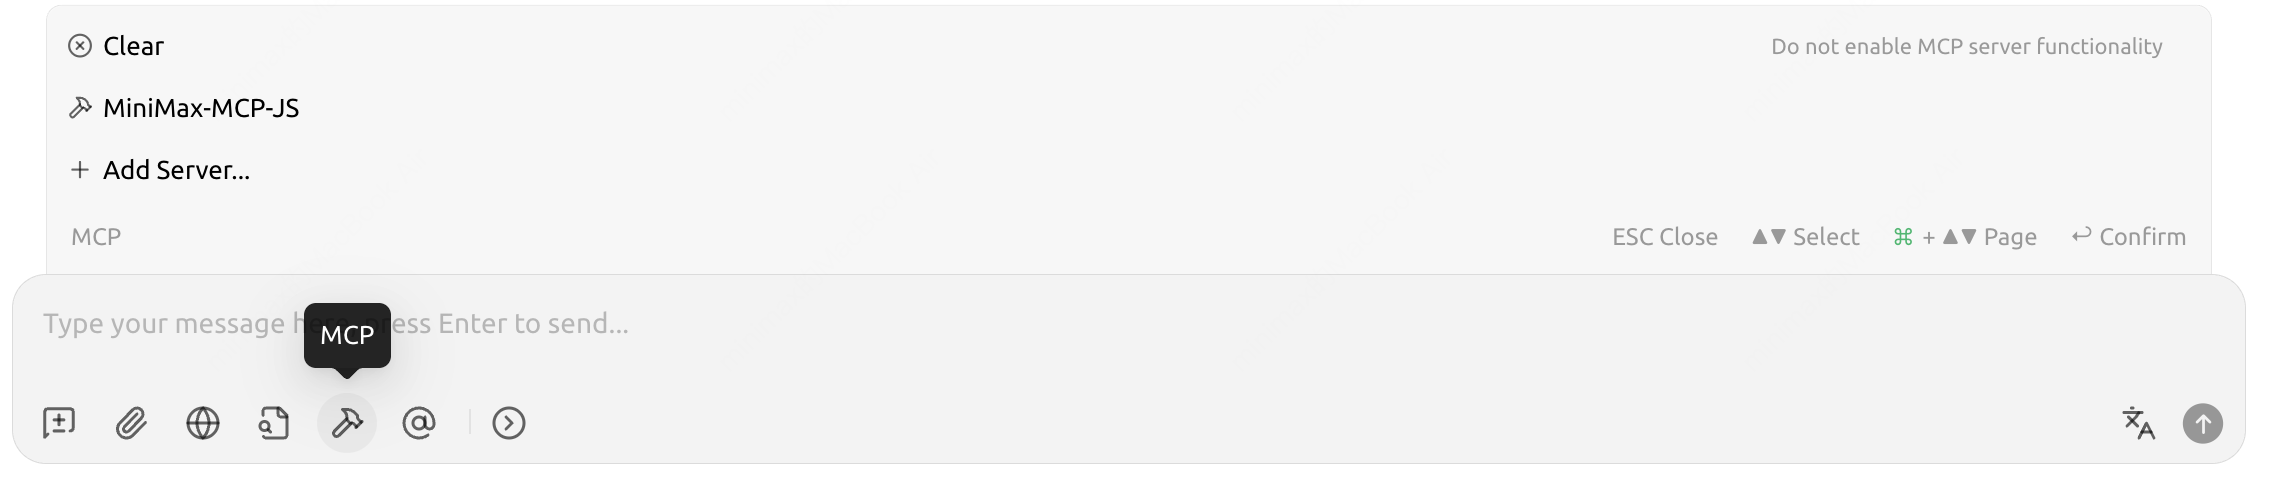
- In the chat panel, click
MCP Settingsand select the configured “MiniMax MCP” to use it.

Use the MiniMax MCP JS Server in Clients
Get an API Key
- Visit the MiniMax Developer Platform.
- Click the “Create new secret key” button and enter a project name to create a new API Key.
- After creation, the system will display the API Key. Be sure to copy and save it securely. The key is shown only once and cannot be viewed again.
Node.js and npm Installation
Node.js is an open-source JavaScript runtime that can run JavaScript outside the browser. It is based on Google’s V8 engine, with high performance, event-driven, and non-blocking I/O characteristics, making it suitable for high-concurrency network services, real-time apps, and microservices. npm is the default package manager installed with Node.js and the world’s largest software registry. Developers can use npm to search, install, update, and manage dependencies (both frontend and backend), greatly simplifying development.- Install Node.js and npm
- Verify installation
Transport Modes
MiniMax-MCP-JS supports studio, REST, and SSE; choose as needed| Mode | stdio (default) | REST | SSE |
|---|---|---|---|
| Runtime | Local only | Local or cloud deployment | Local or cloud deployment |
| Communication | Via standard I/O | Via HTTP requests | Via server-sent events |
| Use Case | Local MCP client integration | API services, cross-language calls | Applications requiring server push |
| Input | Supports local files or URL resources | When deployed in cloud, URL input recommended | When deployed in cloud, URL input recommended |
Use in Claude Desktop
- Download Claude Desktop.
- Go to
Claude > Settings > Developer > Edit Config > claude_desktop_config.json, add the following configuration. - Restart Claude Desktop when finished. Note: If you’re on Windows, enable “Developer mode” in Claude Desktop to use MCP servers. If you see the error
spawn uvx ENOENT, set the absolute path to uvx in"command".
Use in Cursor
- Download and install Cursor.
- Go to
Cursor -> Preferences -> Cursor Settings -> Tools & Inrgrations -> MCP -> Add Custom MCPto open the MCP tool config file.
- Add MiniMax account configuration in
mcp.jsonfile.
- After configuration, you can view the MCP tools currently supported by MiniMax.

Use in Cherry Studio
- Download the Cherry Studio client.
- Go to
Settings -> MCP Settings -> Add Server -> Import from JSON, paste the following and confirm.
- In the chat panel, click
MCP Settingsand select the configured “MiniMax-MCP-JS” to use it.
Usage Examples
Audio tools
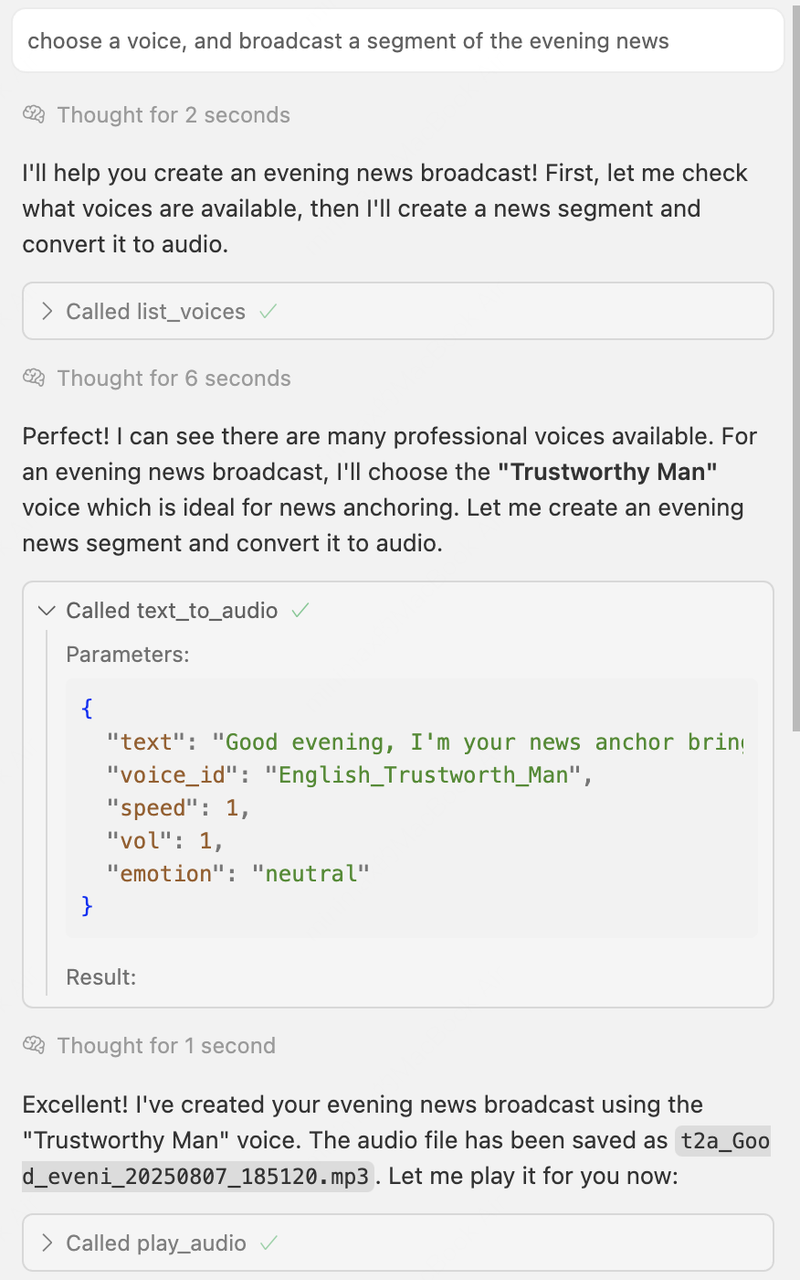
- Choose suitable voice information and broadcast an evening news segment.
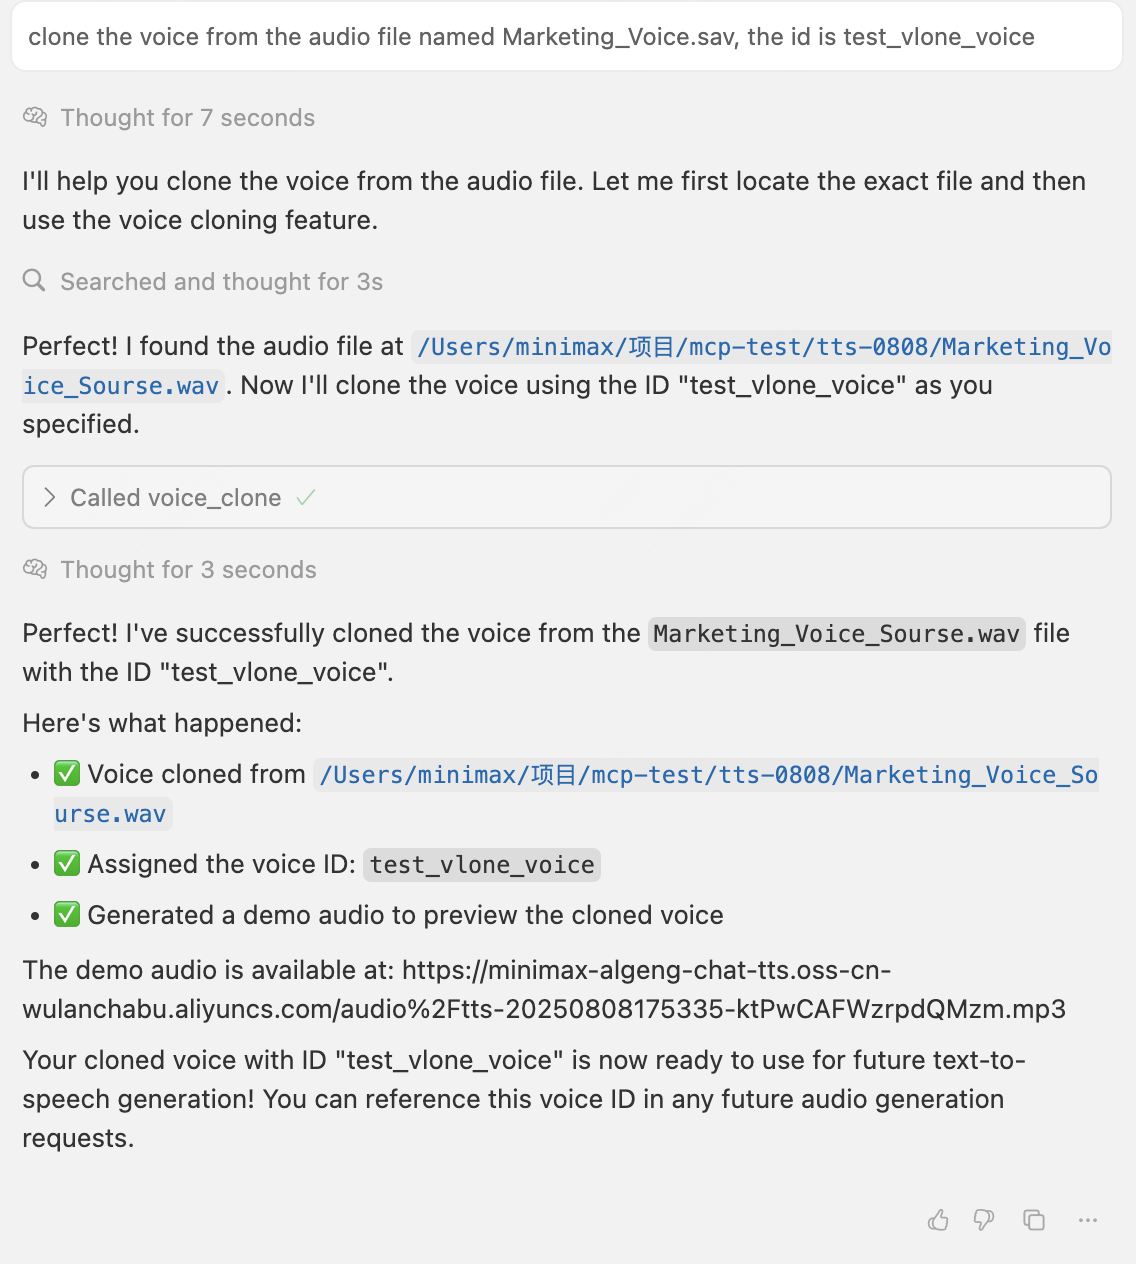
- Clone a voice from a specified audio and specify the cloned voice ID. Reference prompt:
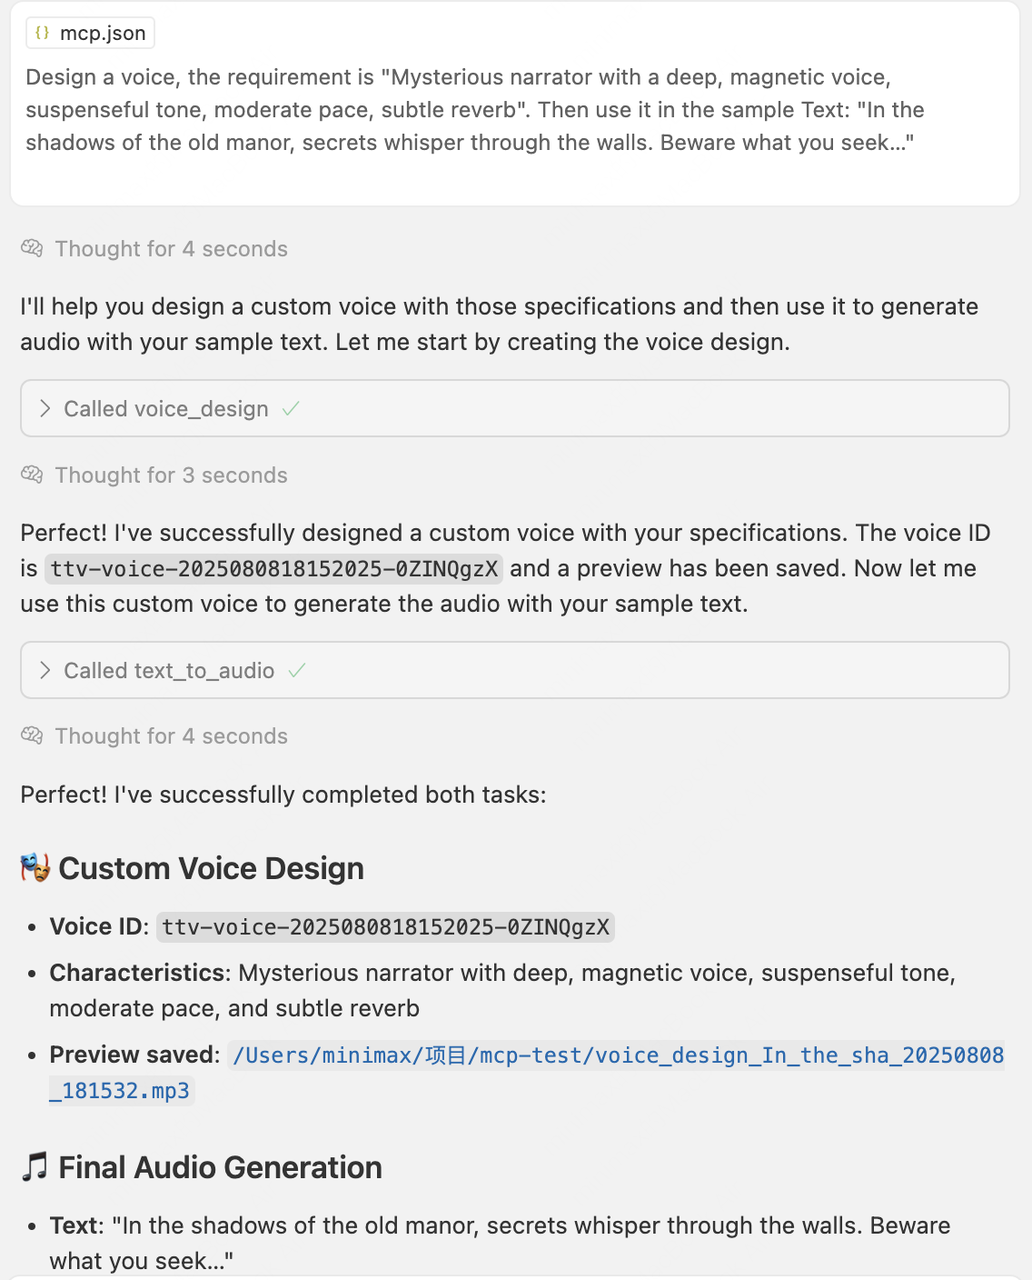
- Design a voice as required and generate audio using the sample text.
Music generation tool
Reference prompt: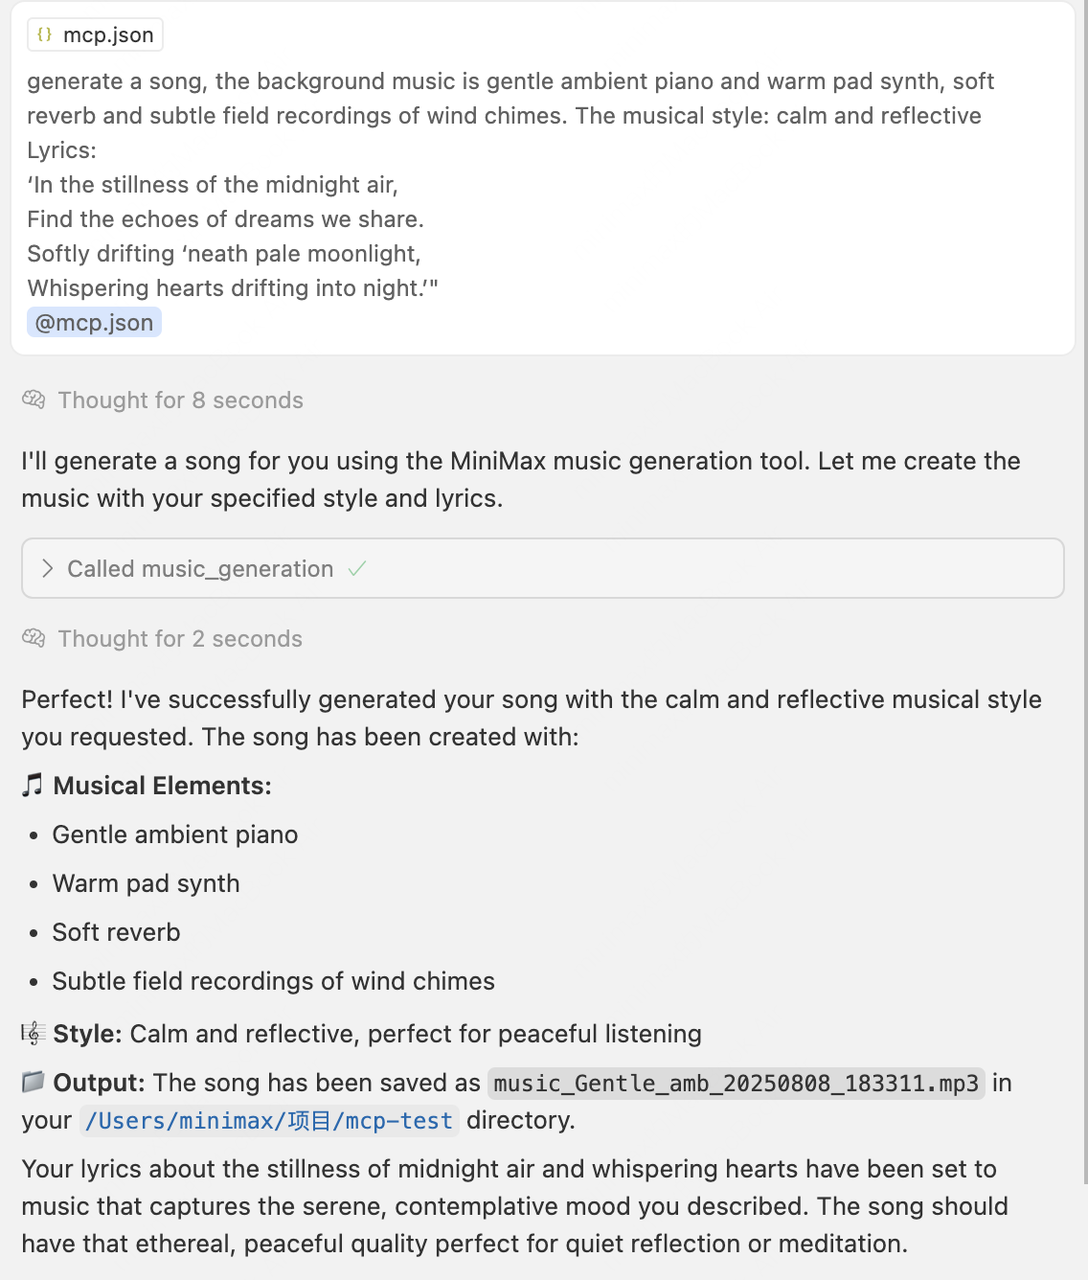
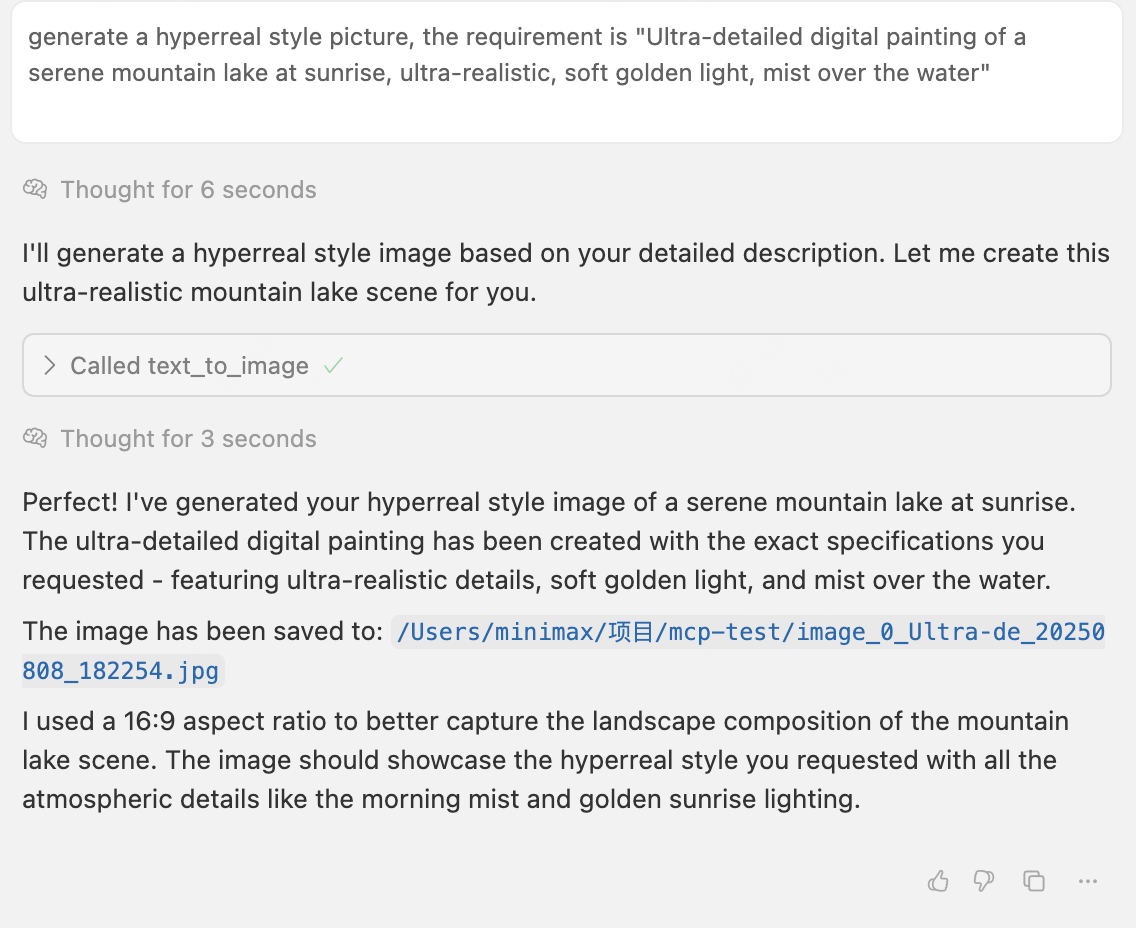
Image generation tool
Reference prompt: Thinking process:
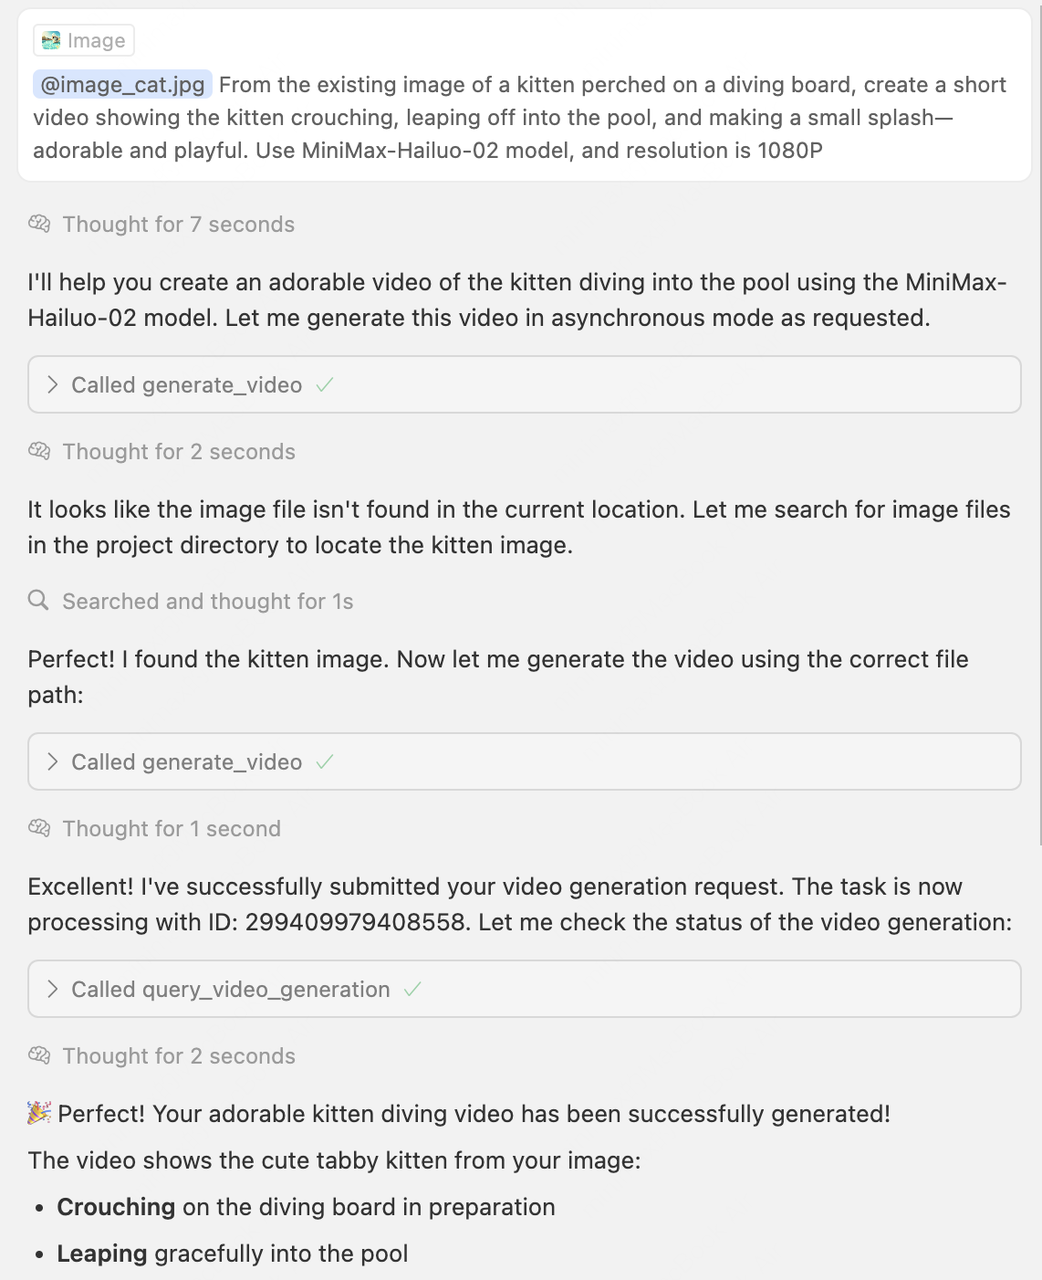
Video generation tool
Reference prompt and image: Generated content:
Thinking process:
Generated content:
Thinking process:
How to contribute
If you would like to contribute to the MiniMax MCP project—whether by adding improvements or fixing bugs—you can do so in the following ways:- Open a new Issue on the GitHub repository (Python version or JS version) and briefly describe the change you propose or the problem you encountered.
- Create a Pull Request (PR) after receiving feedback, following the project’s contribution guidelines. Include a clear description of your changes and any relevant context.
- PR Review: Project maintainers will review your submission and provide suggestions for merging or request further revisions if necessary.